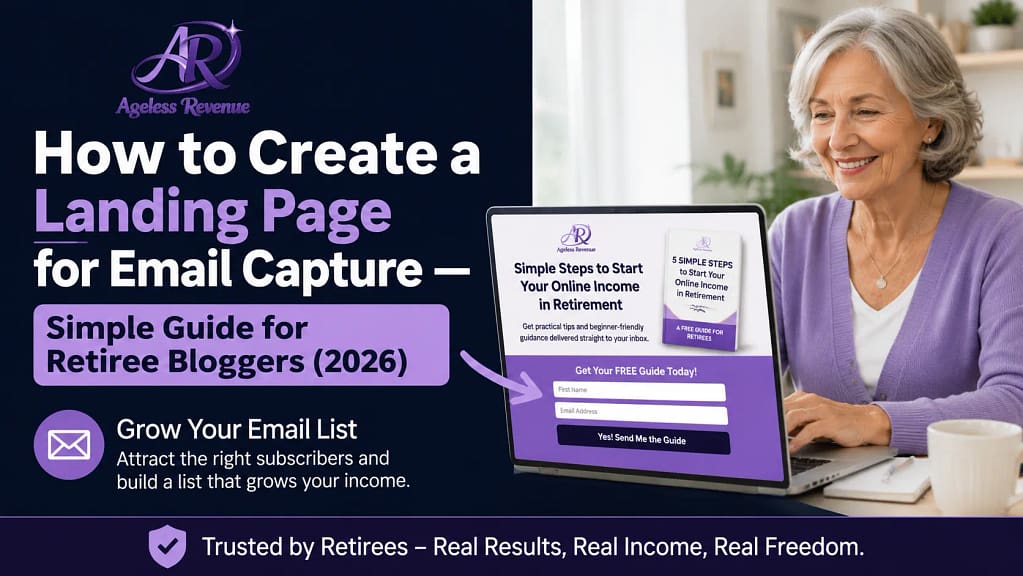
How to Create a Landing Page for Email Capture: A Simple Guide for Retiree Bloggers (2026)
Last Updated on 17 hours ago by Gila
A landing page for email capture retiree bloggers is a single-purpose webpage with one goal: to convert a visitor into an email subscriber. Unlike a blog post or your homepage, a landing page has no navigation menu, no sidebar, no links to other content. There is only one thing to do on a landing page — decide whether to sign up.
This focused design is why dedicated landing pages for email capture retiree bloggers consistently outperform embedded opt-in forms at capturing email subscribers. A reader who arrives at your landing page from a Pinterest pin promoting your free checklist has one clear path: enter their email and download the resource. Nothing else competes for their attention.
This guide shows you how to build a landing page for email capture retiree bloggers that works — using MailerLite’s free landing page builder, without any technical skills, in under an hour.
Affiliate disclosure: This post contains affiliate links. If you buy through them, I may earn a small commission at no extra cost to you.
TL;DR
- A dedicated landing page converts at 20–40% for warm traffic — far higher than an embedded sidebar form at 1–3%
- Five elements determine whether a landing page converts: a specific headline, a clear benefit statement, a lead magnet preview, a simple form, and a trust line.
- Build your landing page inside MailerLite — it is included on the free plan and takes under an hour
- Drive traffic from Pinterest specifically — create pins that link directly to your landing page.
- Test your page by going through the signup process yourself before sending anyone to it.
Why a Dedicated Landing Page Outperforms an Embedded Form
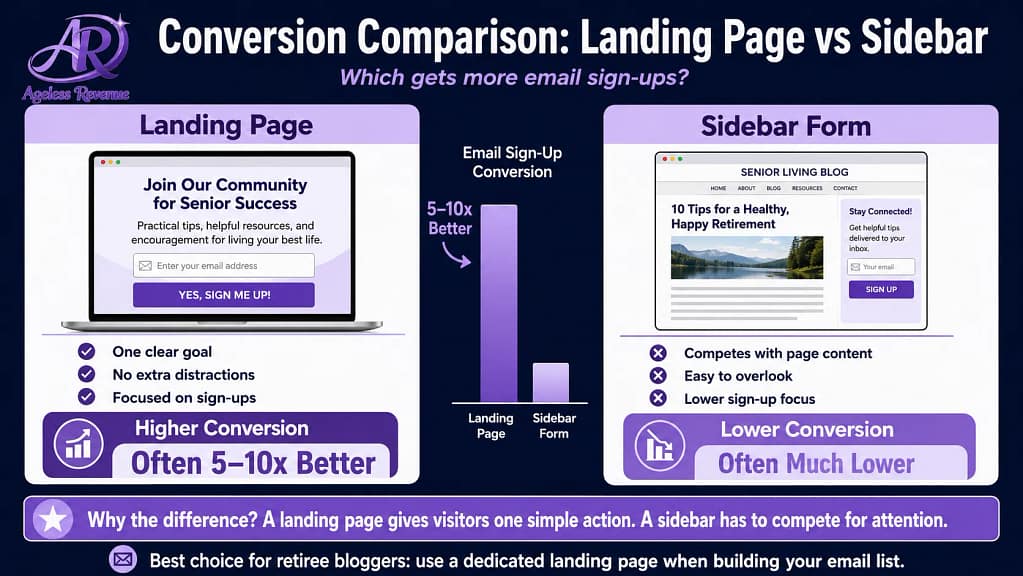
Most new bloggers add an opt-in form to their sidebar and call it done. The sidebar form does convert, at around 1–3% of blog visitors. That is not nothing.
A dedicated landing page for the same lead magnet, driven by Pinterest traffic, typically converts at 20–40% of visitors. That difference is significant because of what a landing page removes: the navigation menu, the recent posts section, the other calls to action, and the visual complexity of a full blog page. When a visitor lands on a page where the only thing to look at is your lead magnet offer, they focus on one decision.
The combination that produces the strongest email list growth for retiree affiliate bloggers: a specific lead magnet + a dedicated landing page + Pinterest pins linking directly to that page.
The Five Elements of a Landing Page That Converts
Creating a Compelling Landing Page for Email Capture Retiree Bloggers
Element 1: A Specific Headline
Your headline is the first thing a visitor reads. It determines in under three seconds whether they stay and read the rest or leave.
A specific headline names the exact outcome: “Get the Free Raised Bed Kit Checklist — 10 Questions to Ask Before You Buy.”
A vague headline wastes the reader’s attention: “Free Resources for Gardeners.”
The difference is specificity. Your ideal reader recognises themselves in a specific headline. A vague headline speaks to no one in particular.
Headline formula that works: Get the Free [Specific Resource Name] — [Specific Benefit in Under 10 Words]
Examples:
- “Get the Free Affiliate Blog Setup Checklist — 15 Steps in the Right Order”
- “Download the Free MailerLite Quick Start Guide for Retiree Bloggers”
- “Get the Free Pinterest Pin Templates — Sized Correctly for 2026”
Element 2: A Clear Benefit Statement
Below the headline, add 2–3 sentences that explain specifically what the reader will be able to do or know after using your lead magnet. Not what the lead magnet contains — what it enables.
Weak (describes content): “This checklist covers 10 questions to ask before buying a raised bed kit.”
Strong (describes benefit): “Before you spend $150 on a raised bed kit, make sure it is actually right for your space and mobility needs. This checklist walks you through the 10 questions experienced raised bed gardeners ask — so you buy the right kit the first time.”
The benefit statement speaks to the reader’s real concern — making a good decision before spending money. That concern is what motivates them to hand over their email address.
Element 3: A Lead Magnet Preview Image
Show the reader what they are getting. A simple mockup of your checklist or guide — a flat lay image of a printed document, or a device mockup showing a PDF — significantly increases conversion rates over a landing page with text only.
Create this in Canva. Search “PDF mockup” or “ebook cover” in Canva’s templates. Swap in your lead magnet title and apply your brand colours. Download and add to your landing page.
Seeing the resource makes it feel tangible and real rather than abstract. This one addition typically increases conversion rates by 10–20%.
Element 4: A Simple Opt-In Form
Your form should have two fields maximum: first name and email address. Every additional field reduces conversion rate. You do not need a last name, a phone number, or answers to questions. First name (for personalised email greetings) and email address.
Label your submit button with a benefit, not a generic word. “Get the Free Checklist” converts better than “Submit” or “Subscribe.” “Download Now” converts better than “Sign Up.”
Your button should be in a colour that contrasts clearly with the rest of the page, so it is immediately obvious as the action to take.
Element 5: A Trust Line
Add one short line below your form that reduces the friction of giving you an email address. Something like:
“No spam. One helpful email per week. Unsubscribe any time.”
This addresses the reader’s implicit concern — that subscribing means being deluged with promotional emails they cannot escape. A simple, honest reassurance removes the last hesitation before they click the button.
How to Build Your Landing Page in MailerLite
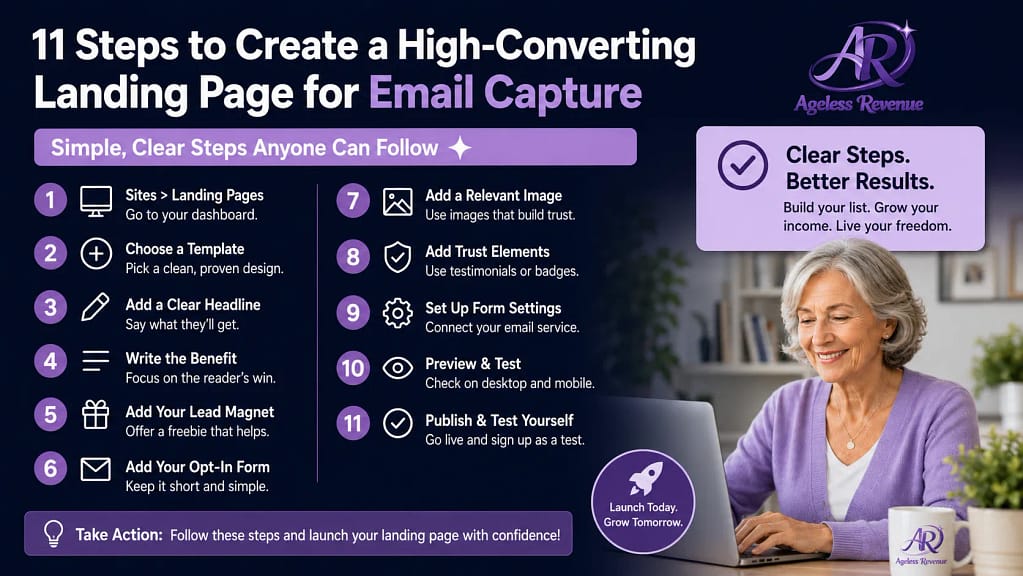
MailerLite includes a landing page builder on its free plan. Here is the process:
Step 1: In MailerLite, go to Sites → Landing Pages → Create new landing page
Step 2: Choose a template. MailerLite has clean, minimal templates designed for lead capture. Choose the simplest one — you will replace most of the content anyway.
Step 3: Edit the headline. Click the headline text and replace it with your specific headline.
Step 4: Edit the body text. Replace the template body text with your 2–3 sentence benefit statement.
Step 5: Add your lead magnet preview image. Click the image placeholder and upload your Canva mockup image.
Step 6: Edit the form. Confirm it captures the first name and email address. Edit the button text to say “Get the Free [Resource Name].”
Step 7: Add your trust line below the form.
Step 8: Connect the form to your lead magnet delivery. In the form settings, set the confirmation action to send a specific automation email (your lead magnet delivery email).
Step 9: Set your landing page URL. MailerLite gives your page a URL like yourname.mailerlite.com/free-checklist. You can also use a custom URL if you have a domain connected.
Step 10: Preview on both desktop and mobile. Your page must look clean and readable on a phone — many Pinterest users browse on mobile.
Step 11: Go through the entire signup process yourself. Enter your own email address, confirm the sign-up if required, and verify that you receive the lead magnet delivery email correctly. Fix anything that does not work before sending visitors to the page.
Driving Traffic to Your Landing Page With Pinterest
Pinterest is the most effective channel for driving traffic to an email capture landing page for a retiree blogger. Here is why it works so well:
Pinterest users search with intent. Someone searching “raised bed kit for seniors” is actively researching — they are exactly the readers who would want your raised bed checklist. Your pin appears in their search results, they click, and they arrive at a page offering exactly the resource that answers their question. The alignment between what they searched for and what you offer is direct.
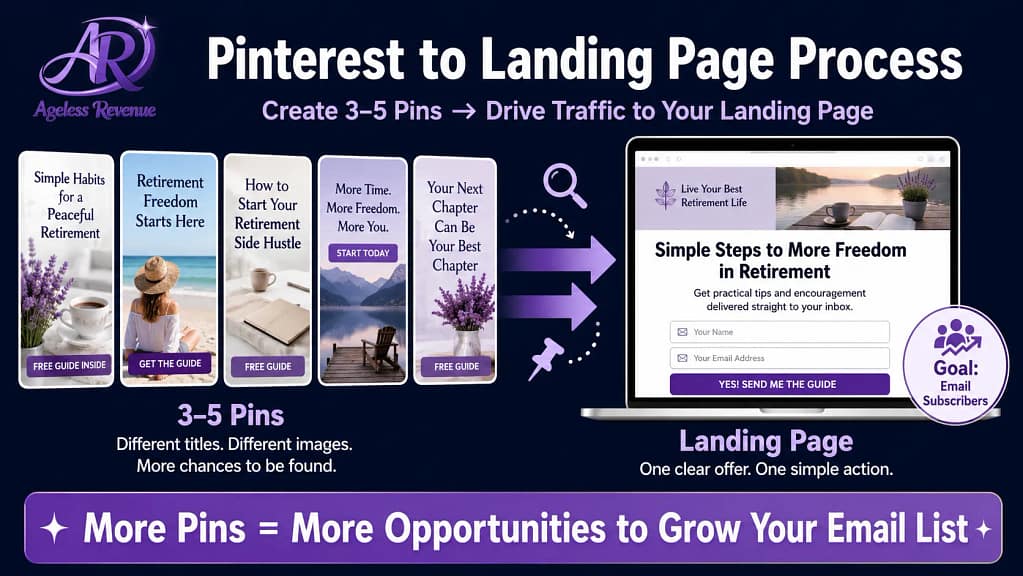
How to create landing page pins in Pinterest:
Create 3–5 pins specifically for your landing page — different from the pins you create for blog posts. Each pin image should show your lead magnet mockup with a clear text overlay: “Free: [Lead Magnet Title] — Click to Download.”
Use your target keyword in the pin title and description. Link every pin directly to your landing page URL — not to your homepage or a general blog post.
Schedule these pins in rotation throughout the month using BlogToPin or Pinterest’s own scheduler. A well-targeted landing page pin can drive opt-ins for months after you create it.
Testing and Improving Your Landing Page
Once your landing page has received 100 visitors, check its conversion rate in MailerLite’s landing page analytics. The percentage of visitors who subscribed is your conversion rate.
Above 30%: excellent. This landing page is working well. Create more Pinterest pins to drive more traffic to it.
20–30%: good. Make small improvements — try a more specific headline or a stronger benefit statement.
Below 20%: needs work. Most commonly, this is caused by a vague headline, a lead magnet that does not match what the Pinterest pin promised, or a form that asks for too much information. Make one change at a time and recheck.
Frequently Asked Questions
Do I need a separate landing page tool, or can I use MailerLite?
MailerLite’s landing page builder is sufficient for most retiree bloggers. It is free, included in your account, and produces clean, functional landing pages. A separate tool like Leadpages or Unbounce adds cost and complexity without meaningful benefit at the beginner stage.
Should my landing page be on my blog domain or on MailerLite’s domain?
Either works, but a landing page on your own domain (agelessrevenue.com/free-checklist) looks more professional than a MailerLite subdomain URL. You can connect your domain to MailerLite in Settings → Domains, or create a simple WordPress page with your lead magnet form embedded. Both approaches work — start with the MailerLite-hosted page and connect your domain when you have time.
How long should my landing page be?
Short. The five elements above — headline, benefit statement, preview image, form, trust line — are all you need. A landing page longer than one screen rarely converts better than a shorter one, because extra content gives readers reasons to keep reading rather than reasons to sign up. If your lead magnet is compelling, the pitch should be brief.
Can I have more than one landing page?
Yes, and you eventually should. As your blog grows, create a different landing page for each main lead magnet you offer. Different topics attract different readers, and a targeted landing page for each lead magnet will always outperform a single general opt-in page.
Your Next Step
Build your first landing page in MailerLite this week. Use the five-element structure above, keep it to one screen, and go through the entire signup process yourself before sending traffic to it. Then create three Pinterest pins linking to the page and schedule them.
For the complete guide to growing your email list with lead magnets and Pinterest, read Email List Growth Strategies for Retiree Bloggers.
For the complete email marketing guide for your affiliate blog, read Email Marketing for Retiree Bloggers.
For a structured path with training, tools, and community support, try Wealthy Affiliate free →
This post contains affiliate links. If you buy through them, I may earn a small commission at no extra cost to you.