How to Build Your First Affiliate Website (2026)
Once you have a niche, the next step is getting a website live. This intimidates a lot of new bloggers more than it should — the actual process is mechanical, well-documented, and takes well under an hour of hands-on work, even with no prior technical experience. This guide explains how to build your first affiliate website.
This guide walks through every step, from buying your domain to publishing your first page.
Follow along as we dive into how to build your first affiliate website step by step.
Affiliate disclosure: This post contains affiliate links. If you buy through them, I may earn a small commission at no extra cost to you.
TL;DR
- You need three things: a domain name, hosting, and WordPress — total cost $15-20/month
- Most hosts offer one-click WordPress installation, taking under 10 minutes
- Use a lightweight theme like GeneratePress rather than a heavy page-builder theme
- Create four essential pages before publishing any content: Home, About, Contact, Affiliate Disclosure
- A simple, live site with three honest posts beats a beautifully designed site with nothing on it
The Three Things Your Website Needs
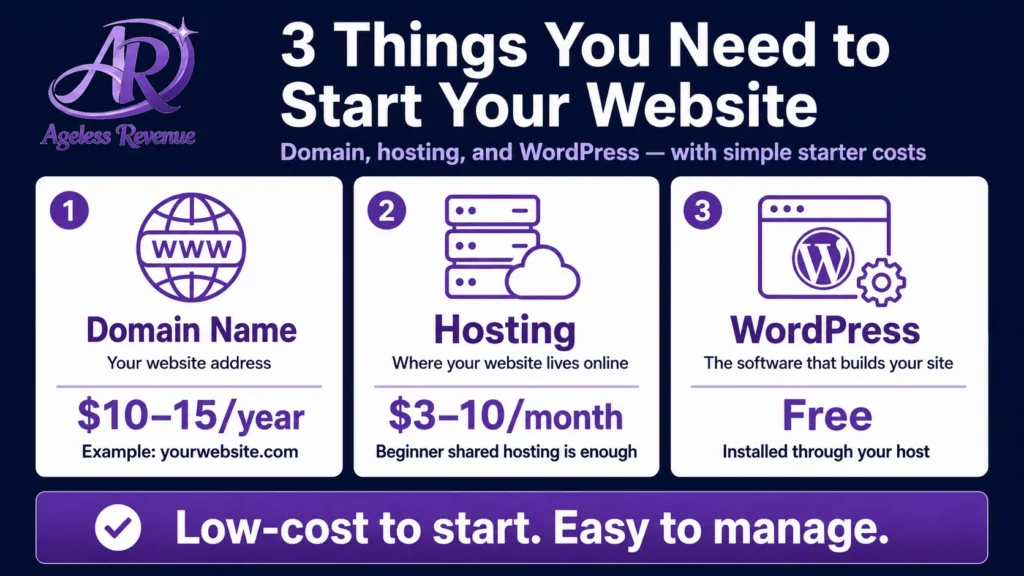
A domain name ($10-15/year). This is your address — yoursite.com. Choose something short, easy to say aloud, and easy to spell from hearing it. Avoid hyphens and numbers where possible. You can register a domain directly through your hosting provider, or separately through a registrar like Namecheap.
Hosting ($5-15/month). This is the server space where your website’s files actually live. For a new site, shared hosting from a reputable beginner-friendly provider is entirely sufficient — you do not need anything more sophisticated until your traffic grows substantially. Look for a host that includes SSL (the padlock icon, required for trust and SEO), automatic backups, and responsive support.
WordPress (free). WordPress powers a significant share of all websites on the internet for a reason — it is free, flexible, and has more beginner tutorials than any other platform. Nearly every hosting provider offers one-click WordPress installation as part of setup.
Step-by-Step: From Nothing to a Live Site
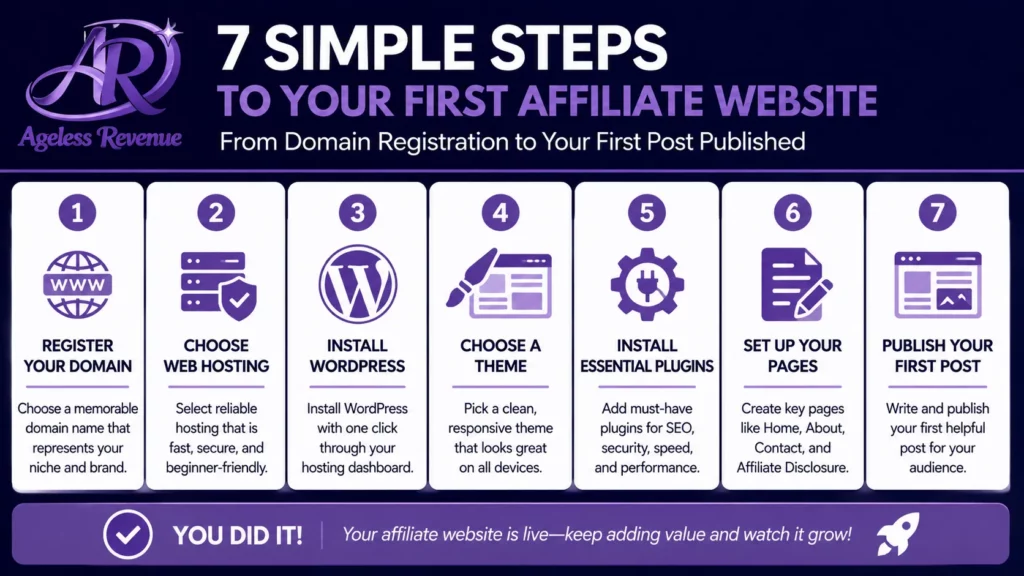
Step 1 — Choose and register your domain. Brainstorm a handful of options, check availability through your chosen host or registrar, and register the one that fits your niche and is easy to remember.
Step 2 — Choose hosting and connect your domain. Sign up with your hosting provider, connect the domain you registered (or register it directly through them, which simplifies this step), and wait for the DNS to propagate — this can take anywhere from a few minutes to a few hours.
Step 3 — Install WordPress. Use your host’s one-click installer. You will be asked to choose a site title (you can change this later) and create your admin login. This step typically takes under ten minutes.
Step 4 — Install a clean, lightweight theme. Avoid themes with heavy built-in page builders and bloated feature sets — they slow your site down and create unnecessary complexity. GeneratePress is a strong choice: lightweight, fast, and easy to customise without technical skill. Ageless Revenue uses it.
Essential Steps on How to Build Your First Affiliate Website
Step 5 — Install your essential plugins. At minimum: an SEO plugin (RankMath, free), a security and backup plugin (UpdraftPlus, free), and an image optimisation plugin to keep your site loading quickly. Resist the urge to install more than this in week one — fewer plugins means fewer things that can break.
Step 6 — Create your four essential pages.
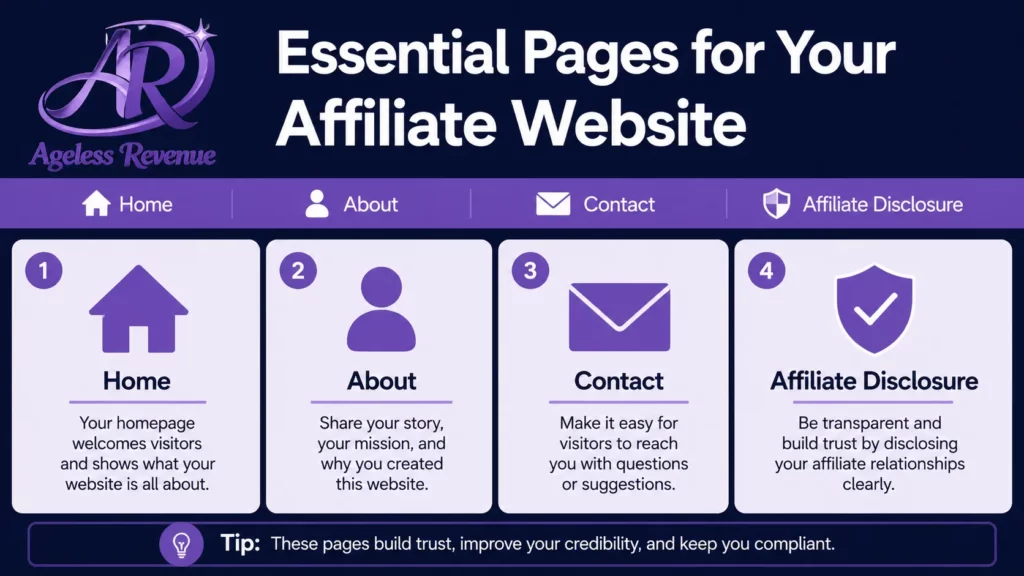
- Home — a brief welcome explaining what your blog is about and who it is for, with links to your best content as it accumulates
- About — your story in two or three paragraphs. This is one of the most-read pages on any blog, and where your personal experience and credibility come through most clearly.
- Contact — a simple form, nothing elaborate
- Affiliate Disclosure — required before you add a single affiliate link. State plainly that some links on your site are affiliate links and that you may earn a commission at no cost to the reader
Step 7 — Write and publish your first post. Choose one topic from your validated niche, target one specific keyword, and write something genuinely helpful. Do not wait for the site to feel “finished” — a live site with one honest post is infinitely more valuable than a perfect-looking site with nothing published.
What Not to Worry About Yet
Perfect design. A clean, simple, fast-loading site beats an elaborately designed slow one every time, for both readers and search engines. You can refine the visual design later, once you have content and traffic to justify the time investment.
Every possible plugin. Email marketing, advanced analytics, social sharing buttons — these matter, but they matter more once you have a handful of posts published than they do on day one. Install the essentials, publish, and add tools as you actually need them.
A complex content strategy. You need your next three to five post topics decided, not a fully mapped twelve-month editorial calendar. The calendar can develop as you learn what resonates with your specific readers.
A Realistic First-Week Timeline
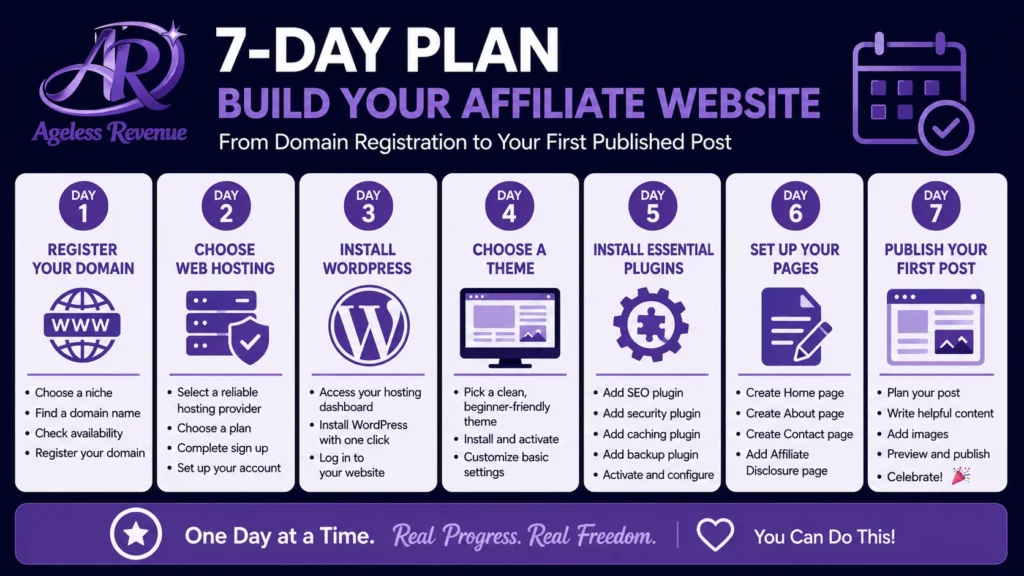
Day 1: register domain, set up hosting, install WordPress (30-45 minutes total).
Day 2: install theme and essential plugins, set up basic site settings (20-30 minutes).
Day 3: write and publish your About page and Affiliate Disclosure page.
Day 4-5: Write your first blog post.
Day 6-7: publish your first post, set your focus keyword in RankMath, and share it to Pinterest if you have set that up.
A week of modest daily effort, and you have a genuinely live, functioning affiliate blog.
Frequently Asked Questions
Do I need to know how to code?
No. WordPress’s visual editor (the block editor) lets you build pages and posts without touching any code. Most retirees feel comfortable with the basics within their first few sessions.
Which hosting provider should I choose?
Look for a provider that specifically markets to WordPress beginners, offers one-click installation, includes SSL and backups, and has responsive support — ideally live chat rather than email-only. Avoid providers whose primary appeal is a rock-bottom price with no support infrastructure behind it.
Should I use a free theme or pay for one?
A free, lightweight theme like GeneratePress is entirely sufficient to start. Paid themes can add visual polish later, but they are not necessary for a functioning, fast, professional-looking site in your first months.
How long before my site looks “professional”?
A clean, simple WordPress site with a lightweight theme looks professional from day one if you avoid clutter and keep the design simple. Professionalism comes from clean design and genuinely useful content far more than from expensive custom design work.
Your Next Step
If you have not yet registered a domain, do that today — it is the one step that unblocks everything else. Once your domain and hosting are connected and WordPress is installed, come back and work through Steps 4 through 7 above over the following few days.
For the complete overview of getting started with affiliate marketing as a retiree, read Getting Started With Affiliate Marketing as a Retiree.
For a structured path that includes hosting, training, and website building support all in one place, try Wealthy Affiliate free →
This post contains affiliate links. If you buy through them, I may earn a small commission at no extra cost to you.