

Last Updated on 3 weeks ago by Gila
Starting your first website can feel exciting… and also a little intimidating if you’re not “techy.” If you’re a retiree, you might be thinking: “I want to do this, but I don’t want to spend my days fighting with settings, plugins, and jargon.”
Here’s the good news: in 2026, you can launch a clean, simple affiliate site without coding, without fancy tools, and without trying to be perfect. You just need a calm setup plan and a steady routine.
Offer: Download the free Starter Kit (printable checklists + a simple weekly plan):
https://agelessrevenue.com/starter-kit/
Disclosure: This post may contain affiliate links. If you click and purchase, I may earn a commission at no extra cost to you. I only recommend tools and services I believe are genuinely helpful.
TL;DR (2026) — The calm setup plan
If you only want the short version, do this:
- Choose one niche direction (one audience + one main topic).
- Buy a domain and choose beginner-friendly hosting.
- Install WordPress and use a clean theme (GeneratePress is a great choice).
- Set essential settings (permalinks, SSL/https, site title, basic navigation).
- Create 5 key pages: Home, Start Here, About, Contact, Privacy + Affiliate Disclosure.
- Publish your first 3–5 helpful posts (how-to + checklists first).
- Add basic SEO: title, meta description, internal links, image ALT text.
- Set up Google Search Console and a simple analytics tool.
- Follow a weekly routine for 8 weeks so you keep momentum.
What “launch” really means (so you don’t get stuck)
When beginners say “I want to launch my site,” they usually mean one of two things:
- “I want a website online that I’m not embarrassed to show people.”
- “I want a site that’s ready to grow traffic and eventually earn.”
In this guide, “launch” means both — but in a beginner-friendly way.
You do not need a perfect logo, perfect colors, or 50 posts to launch. You need:
- A clean site that loads properly
- Clear navigation (so visitors know what to do)
- The key trust pages (About, Contact, Privacy, Disclosure)
- A few helpful posts (so the site looks real)
- A simple plan to keep going (this is the part most people miss)
Think of your site like a small, helpful library. You’re putting the doors on the building first. Then you add books (posts) every week.
Step 0 — Your calm pre-launch checklist (10 minutes)
Before you click “Buy” on anything, do this quick pre-launch checklist. It keeps you from feeling scattered.
- Write one sentence describing your site: “I help _____ do _____.”
Example: “I help retirees start affiliate marketing with calm, step-by-step guidance.” - Decide what your first 3 posts will be. Titles can be rough drafts.
- Choose your main “offer” you’ll mention across the site. For this site, your offer is the Starter Kit.
- Pick your weekly schedule (even two short sessions is enough). A calm schedule might be:
- 45 minutes writing
- 20 minutes editing
- 15 minutes adding images + links
If you can do that twice per week, you can build a real site.
Step 1 — Choose a retiree-friendly niche you can stick with (2026)
A niche is the main topic your site focuses on. The best niche is usually a blend of:
- What you care about (or can comfortably learn)
- What people search for
- What people buy
If your niche is too broad (like “health” or “travel”), you’ll compete with giant websites. If it’s too narrow, you’ll run out of topics quickly. The sweet spot is “specific enough to be clear, but wide enough to grow.”
The 4-question niche test
Before you commit, answer these:
- Who is my reader?
Example: retirees starting a hobby, seniors trying gentle fitness, beginners building a website. - What problem do they want solved?
Example: “I want simple steps,” “I don’t want to waste money,” “I need beginner-friendly tools.” - What do they buy to solve it?
Supplies, equipment, subscriptions, courses, services. - Can I list 20 post ideas right now?
If yes, you have content runway.
Retiree-friendly niche ideas (2026)
Here are niches that often work well for retirees because they’re practical and evergreen:
- Low-impact fitness at home (bands, balance tools, simple routines)
- Accessible gardening (raised beds, ergonomic tools, container gardening)
- Beginner crafts (starter kits, simple projects, tool guides)
- Simple cooking (small appliances, healthy meals, beginner gear)
- Travel comfort (packing tools, comfort products, mobility-friendly tips)
- Tech for seniors (setup guides, troubleshooting, beginner devices)
- Affiliate marketing for retirees (training, tools, step-by-step guidance)
If your site is about helping beginners start an online business (like Ageless Revenue), that’s a niche too — and it can work well because your reader is searching for calm, step-by-step guidance.
Step 2 — What you need (and what you don’t) in 2026
You need fewer things than you think.
You need
- A domain (your website name)
- Hosting (where your website “lives”)
- WordPress (the website software)
- A clean theme (how your site looks)
- An SEO plugin (you’re using The SEO Framework — great)
You do NOT need
- A page builder with 50 settings
- 20 plugins
- A fancy logo before you publish
- Paid tools to “unlock” WordPress
- Perfect design
Most retirees do best with a clean setup and a calm routine. Your website should feel like a friendly, easy-to-read guide — not a cluttered brochure.
Typical beginner costs (realistic ranges)
Costs vary by provider and promotions, but many beginners can launch with:
- Domain: about $10–$15/year
- Hosting: often $3–$10/month on starter plans (renewals vary)
- WordPress: free
- Theme: GeneratePress has a strong free version; premium is optional
Start simple. Upgrade later only if you have a clear reason.
Step 3 — Domain name (quick and practical)
Your domain should be:
- Easy to say out loud
- Easy to spell
- Not too long
Avoid:
- Hyphens
- Numbers
- Tricky spellings
If you already have a domain, great. If not, choose one that fits your niche and feels trustworthy.
Step 3.5 — Domain details: how to choose a name that builds trust
If you’re unsure about a domain name, use these beginner rules:
- Choose a name that sounds trustworthy (not gimmicky).
- Avoid anything that looks spammy in Google results.
- If your niche is personal (your story), a brand name works well.
- If your niche is very specific (like a hobby), a descriptive name can work well.
If you’re stuck, pick a simple brand-style domain and let your content clarify the niche. In 2026, good content matters more than the “perfect” domain.
Domain safety checklist
Before you finalize a domain:
- Check spelling (say it out loud).
- Check for confusing letters (like l vs I).
- Make sure it’s not easily mistyped.
- Search Google for the name to avoid confusion with another brand.
- Confirm you don’t “need” social handles to start (social can come later).
A beginner safety tip (do this now)
Create a “Website Logins” note (paper or password manager) that includes:
- Domain registrar login
- Hosting login
- WordPress login URL (yoursite.com/wp-admin)
- Admin email
This one simple habit prevents 90% of “I’m stuck” moments later.
Step 4 — Hosting (beginner-friendly choices)
Hosting is your website’s home. You want hosting that is:
- Reliable
- Easy to use
- Backed by decent support
For beginners, what matters most is:
- One-click WordPress install
- Free SSL (https)
- Backups (included or easy to add)
- Support that answers questions clearly
Don’t get stuck comparing hosts for weeks. Pick a reputable beginner host and move on.
Hosting checklist (print this)
Before you buy, make sure you have:
- SSL included
- Backups available
- 1-click WordPress install
- Support you can reach (chat/ticket)
- Simple dashboard
Step 4.5 — Hosting: beginner decisions that matter (and what to ignore)
Hosting plans can look complicated because they’re full of upsells. Here’s what matters:
What matters:
- Reliable uptime (your site is available)
- Support you can reach
- SSL included
- Backups available
- WordPress install is simple
What you can ignore for now:
- Premium “SEO” add-ons from your host
- Extra “security bundles” you don’t understand
- Paying for email hosting on day one (you can add later)
- Any add-on that feels confusing or pressured
Calm rule: buy the basic plan, get the site online, and revisit upgrades only when you know why you need them.
Step 5 — Install WordPress (the simple way)
Most hosting providers include a one-click WordPress installer. Once installed, you’ll log in at:
yoursite.com/wp-admin
If you’ve never used WordPress, here’s the “translation”:
- WordPress Dashboard = your control room
- Posts = blog articles
- Pages = Home/About/Contact/Start Here
- Appearance = theme settings
- Plugins = add-ons (use sparingly)
Do these WordPress settings immediately (beginner-proof)
- Permalinks: Settings → Permalinks → Post name
- Site title/tagline: Settings → General
- Timezone: set it correctly so scheduling works
- Search visibility: make sure “Discourage search engines” is NOT checked when you’re ready to be indexed
Common setup snag (DNS) — what to know
If you bought your domain in one place and hosting in another, you may need to connect them using “nameservers” (DNS). This is the part that confuses most beginners.
Calm rule: if the domain isn’t pointing correctly after a few hours, contact hosting support and say:
“My domain isn’t pointing to my hosting yet. Can you help confirm my nameservers/DNS?”
This is a normal request. Support teams handle it all day.
Step 5.5 — WordPress: the only settings beginners should touch at first
WordPress has a lot of menus. You only need a handful early on:
- Posts: where you write your blog articles
- Pages: Home, Start Here, About, Contact, Privacy/Disclosure
- Appearance: theme settings (GeneratePress)
- Plugins: keep this minimal
- Settings: permalinks, general settings
Everything else can wait.
Recommended basic plugin list (2026):
- The SEO Framework (SEO)
- A contact form plugin (WPForms Lite or similar)
- A backup plugin only if your host doesn’t do backups
- An image compression plugin if your setup needs it (optional)
Beginner note: too many plugins cause slowdowns and conflicts. If a plugin doesn’t solve a real problem, skip it.
Step 6 — Theme setup (GeneratePress: calm, clean, fast)
GeneratePress is a great choice for affiliate sites because it’s lightweight and readable. For retirees and beginners, readability is a huge advantage.
Make your site easy to read (this increases trust)
In 2026, “easy to read” is not a style preference — it’s a conversion booster. People stay longer and trust you more when the text is comfortable.
Aim for:
- Slightly larger font size than default
- Comfortable line spacing
- Short paragraphs (2–4 lines)
- Clear headings
- Lots of white space
Step 6.5 — Make your site “retiree readable” (quick settings that matter)
If your audience includes retirees or beginners, readability is part of SEO and conversion.
Use these practical settings:
- Increase font size slightly
- Increase line-height slightly
- Use plenty of space between paragraphs
- Use clear headings every few sections
- Avoid long paragraphs (they feel overwhelming on phones)
A site that’s easy to read builds trust, and trust drives clicks.
Keep your top menu short:
- Home
- Start Here
- Blog
- About
- Contact
Too many menu items create decision fatigue. Your visitor should never wonder, “Where do I go next?”
Sidebar (optional, but keep it simple)
A good beginner sidebar includes:
- Starter Kit CTA (simple button)
- Top posts (3–5 links)
- Short “About” snippet
Avoid filling sidebars with lots of widgets. Simple wins.
Step 7 — The 5 key pages every affiliate site needs (2026)
These pages help with trust, approvals, and professionalism.
- Home — what your site is about + who it’s for
- Start Here — the “best next steps” for beginners
- About — your story and why you created the site
- Contact — a simple contact form
- Privacy Policy + Affiliate Disclosure — basic compliance and transparency
What to put on your Start Here page
Keep it simple:
- A short welcome: “If you’re new, start here.”
- Links to your 3 best beginner posts
- A link to your free Starter Kit
- One sentence about what you help with
This is one of the easiest upgrades you can make, and it helps visitors (and affiliate program reviewers) understand your site immediately.
About page (beginner-friendly structure)
Your About page doesn’t need to be long. It should be clear.
- Who you are (2–4 sentences)
- Why you started this site
- Who it’s for
- What they’ll find here
- Link to your Starter Kit (gentle CTA)
Step 7.5 — Copy-and-paste templates for your key pages
If blank pages make you freeze, use these simple templates.
Home page (simple):
- One sentence: who you help + what you help with
- 3 links: “Start Here,” “Beginner Guide,” “Best Tools”
- One CTA: “Download the Starter Kit”
Start Here page (simple):
- Welcome: “If you’re new, start here.”
- Step 1 link: beginner guide
- Step 2 link: checklist
- Step 3 link: mistakes post
- CTA: “Download the Starter Kit”
About page (simple):
- Who you are
- Why you built the site
- Who it’s for
- What you publish
- CTA: “Download the Starter Kit”
Contact page (simple):
- Short sentence: “Have a question? Use the form below.”
- Contact form
Affiliate disclosure (simple):
- Short, clear disclosure near the top of posts with links
- A disclosure page that repeats the same in a longer format
Start with these templates and improve them later.
Step 8 — Your first 7–10 posts (the fastest way to look “real”)
Most beginners stall because they don’t know what to publish. Use this plan.
Start with these 5 foundation posts:
- Post #1: Beginner guide (how to start)
- Post #2: Checklist (step-by-step)
- Post #3: Mistakes to avoid (and fixes)
- Post #4: Best for beginners (a curated list)
- Post #5: Simple review (one product/service you can recommend honestly)
Add these 2–5 support posts next:
- FAQ post: answer the top questions your audience asks
- “What to look for” buyer guide
- A comparison post (only after you understand both options)
- A resource page (your recommended tools in one place)
- A simple tutorial post
A reusable post format (beginner-proof)
Use this structure for most posts:
- Intro: who it’s for + what they’ll learn
- Step-by-step section with headings
- Tips section
- Common mistakes section
- FAQ (3–7 questions)
- Next step / CTA (Starter Kit or related post)
This structure makes writing easier and keeps your site consistent.
Step 9 — Basic SEO that works in 2026 (no overwhelm)
SEO is simply: helpful content + clear structure.
The basics that matter most:
- One main topic per page
- Clear headings (H2/H3)
- Short paragraphs and bullet lists
- Internal links to related posts (2–5 per post)
- One or two external links to trusted sources (only if helpful)
- Image optimization (small file size + descriptive ALT text)
- A clean SEO title and meta description
Step 9.5 — On-page SEO checklist for every post (2026)
Before publishing, check:
- Title clearly says what the post is about
- First paragraph confirms who it’s for and what they’ll learn
- Headings break the post into sections (H2/H3)
- 2–5 internal links to related posts
- 1–2 external links (only if genuinely helpful)
- At least one image with descriptive ALT text
- Meta title and meta description filled in (The SEO Framework)
If you do only this consistently, your site will grow.
Internal linking (the easiest SEO win)
For each new post:
- Link to 2–5 related older posts
- Update 1–2 older posts to link back to the new post (when relevant)
Internal links keep readers on your site and help Google understand your structure.
Step 10 — The SEO Framework (TSF) setup for beginners
You’re using The SEO Framework, which is lightweight and beginner-friendly.
For each post, do this routine:
- Write an SEO title that matches the reader’s question
- Write a meta description: who it’s for + what they’ll get
- Confirm the page is indexable (not noindex)
- Let TSF handle your sitemap (usually automatic)
Do not chase “perfect scores.” Focus on clarity.
Step 11 — Images (ALT text + speed, beginner style)
Images help people understand your content, but large images slow your site.
Beginner image rules:
- Use descriptive file names (not IMG_1234)
- Compress images before upload
- Add ALT text that describes the image plainly
Good ALT text examples:
- “Beginner website setup checklist for retirees in 2026”
- “Screenshot of WordPress permalinks settings”
- “GeneratePress typography settings for readable text”
Step 12 — Google Search Console (the only parts you need)
Google Search Console helps you:
- Confirm Google can see your site
- Submit your sitemap
- Track what your site appears for
Beginner routine:
- Set it up once
- Submit your sitemap
- Check it weekly (not daily)
SEO is slow. Weekly checks keep it calm.
Step 13 — Backup + security basics (retiree-friendly)
This is where beginners overcomplicate. Keep it simple.
What you need:
- Strong passwords
- Updates (WordPress, theme, plugins)
- Backups (host backups or a backup plugin)
- A secure admin email
If your host includes backups, great. If not, add a simple backup tool.
Calm rule: one good backup system beats five “security” plugins.
Step 14 — A calm 8-week launch plan (2026)
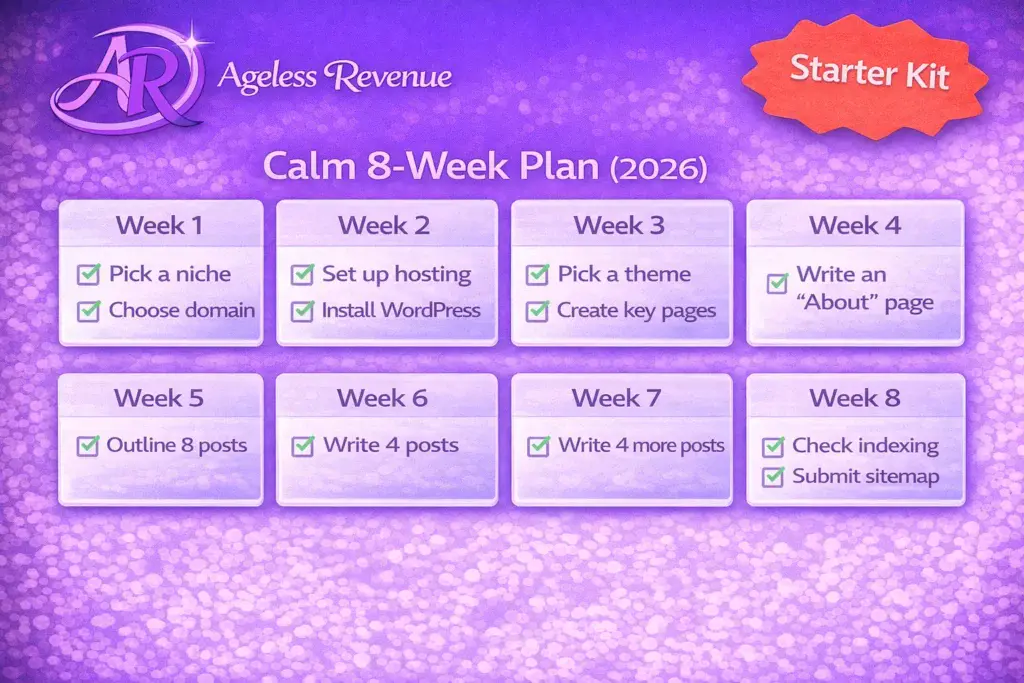
Here’s a realistic plan that keeps you moving:
Week 1: Setup
- Domain + hosting + WordPress + theme
- Create your key pages
- Publish 1 post
Week 2: Content
- Publish 1 post
- Add internal links
- Add images + ALT text
Week 3: Content
- Publish 1 post
- Improve one older post
- Add FAQ section to one post
Week 4: Approvals
- Publish 1 post
- Apply to 1–2 affiliate programs (if your site is ready)
Week 5: Traffic basics
- Publish 1 post
- Set up Search Console
- Create 2 pins or one simple share plan (optional)
Week 6: Improve
- Publish 1 post
- Add internal links between your best posts
- Tidy your Start Here page
Week 7: Monetize gently
- Publish 1 post
- Add a “recommended tools” section where it fits naturally
- Keep disclosures clear
Week 8: Review and repeat
- Notice what posts you enjoyed writing
- Plan the next 4 topics
- Keep going
Consistency wins.
Step 14.5 — Your launch checklist (print this)
Before you tell anyone your site is live, run this checklist:
- SSL works (your site loads with https)
- Permalinks set to “Post name”
- Menu is simple and clear
- Key pages are published (Home, Start Here, About, Contact, Privacy/Disclosure)
- At least 3 posts are published
- SEO title + meta description set for your top post
- Images are compressed and have ALT text
- Google Search Console is set up and sitemap submitted
- You have backups (host or plugin)
If this checklist is done, you are launched.
Step 15 — What to do in the first 30 days (realistic retiree pace)
If you want a calm plan that builds momentum:
Week 1:
- Finish setup and publish 1 post
- Create Start Here page
- Add the Starter Kit link in two places (Start Here + sidebar)
Week 2:
- Publish 1 post
- Add internal links between your two posts
- Add one image to each post with ALT text
Week 3:
- Publish 1 post
- Add an FAQ section to one post
- Set up Search Console
Week 4:
- Publish 1 post
- Improve the first post (clarify headings, add a checklist, add 2 internal links)
- If your site is ready, apply to 1–2 affiliate programs
This is enough to build a real foundation without feeling overwhelmed.
Step 12.5 — Affiliate links: where to add them without feeling “salesy”
Many retirees hesitate here because they don’t want to feel pushy. Good news: affiliate marketing doesn’t need pushy language.
Use this calm rule:
- Recommend tools only when they solve a problem you just explained.
Great places for links:
- After you explain a solution
- In a short “Recommended tools” section near the end
- In a resources page that organizes your favorites
Avoid:
- Adding links before you explain anything
- Stuffing links in every paragraph
- Recommending products you don’t believe in
Transparency builds trust. Trust builds clicks.
Step 13.5 — Email list (optional, but powerful) in 2026
You can start without an email list, but an email list can help you build a relationship with readers.
A calm beginner email plan:
- One simple freebie (your Starter Kit works perfectly)
- One signup form in your sidebar or Start Here page
- One weekly email that links to your newest post
You don’t need fancy automations to begin. You just need consistency.
Mini case study (2026): what a calm beginner site looks like
Imagine your niche is “home fitness for beginners over 60.” You publish:
- A beginner guide
- A checklist
- A mistakes post
- A “best for beginners” equipment list
Now your site looks real, focused, and helpful. You don’t need 50 posts to begin. You need a small library that serves one audience clearly. That’s how affiliate sites grow.
Common problems retirees run into (and the calm fixes)
Problem: “I’m overwhelmed by WordPress.”
Fix: Do one step at a time. Setup first. Publish one post. Then repeat.
Problem: “I don’t know what to write.”
Fix: Start with a checklist post and a beginner guide. Use “People Also Ask” questions for ideas.
Problem: “My site doesn’t look professional.”
Fix: Clean theme + readable text + simple menu + key pages. That’s enough.
Problem: “I’m afraid to sell.”
Fix: Don’t sell. Help. Recommend products only when they truly solve the reader’s problem.
FAQ (2026)
Q: How much does it cost to start a site?
A: Many beginners can launch for roughly $40–$100 depending on domain and hosting choices.
Q: Do I need to be tech-savvy?
A: No. You need a checklist, a calm pace, and support from your host/community when stuck.
Q: How long until I get traffic?
A: Many sites see early visitors in 1–2 months, but meaningful traffic often takes a few months of consistent posting.
Q: What should I publish first?
A: A beginner guide, a checklist, and a “mistakes” post are the fastest trust builders.
Q: Where should I place affiliate links without sounding pushy?
A: Place links after you explain a solution and again near the end in a short recommendation section. Avoid stuffing links throughout the post.
Your next step (keep it simple)
If you do one thing today, do this: choose your first post topic and outline it in 10 minutes.
If you want the printable checklists and weekly plan that match this guide, get the free Starter Kit:
https://agelessrevenue.com/starter-kit/